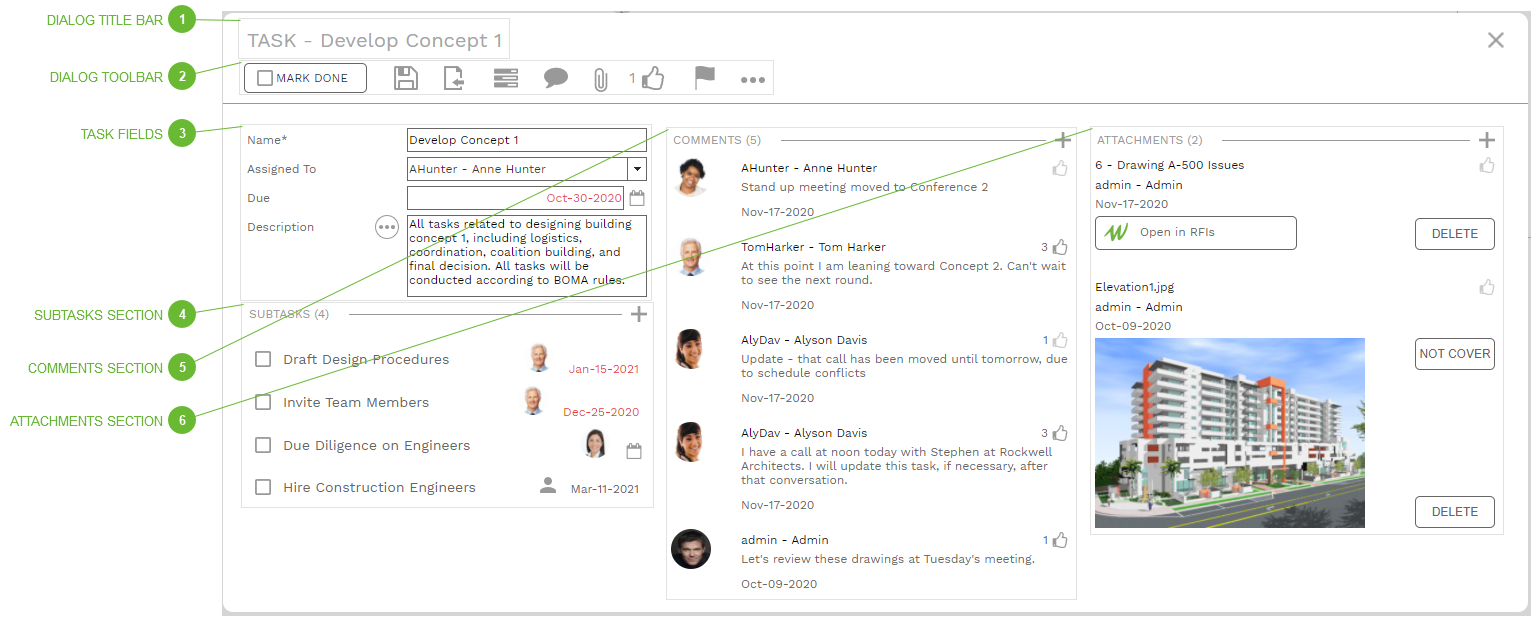
Use this dialog to edit the details of each task. The dialog is opened by clicking and holding a task in Card View or by double clicking a task in List View.
DIALOG TITLE BAR
The title bar shows the name of the currently selected task. If you drill down on subtasks, the subtask chain is shown:
Every task can have an unlimited number of subtasks. Each subtask can contain as much data as its parent task. This allows you to create custom checklists of deliverables for all tasks. Note that only the top level task in a subtask chain appears in Card View and List View.
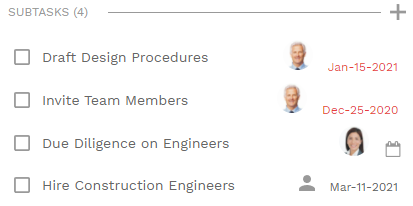
The title bar of the section shows the number of subtasks it contains. To the right of the title is the Plus button. Click the Plus button to add a subtask. The new line appears at the top of the section:
Type a name for the subtask and press ENTER. The subtask is saved and new line appears just below it. If you are done adding subtasks, click anywhere else in the dialog to stop the add process.
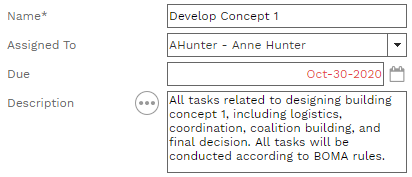
For each subtask, you can:
Click, hold, and drag a subtask up or down in the section to change its order
Click the Done / Not Done toggle buttons
Click the Assigned To button to open the Assign User dialog. Select an eligible user and save to assign them to the task.
Click the Due Date button to open the calendar. Select a date to establish a due date for the task. If the selected date is in the past, it displays in red here.
Double click a task to open it in the Task Details Dialog. Note that by doing this you are drilling down in the subtask chain. To navigate back up the chain, click the Back button in the dialog toolbar.
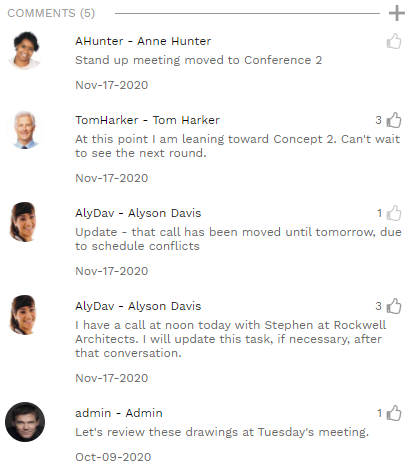
Every task can contain an unlimited number of comments. The latest comment appears at the top of the list. The title bar of the section shows the number of comments it contains. To the right of the title is the Plus button. Click the Plus button to add a comment. The comment dialog opens. Enter a comment in the text field and click the Save & Exit button.
For each comment, you can:
Click the comment to open it in the Comment dialog. Note that you can only edit or delete your own comments.
Click the Like button to like the comment. Click again to remove the like. If the icon is dark gray, you have liked the comment. The number of likes a comment has received appears next to the button.
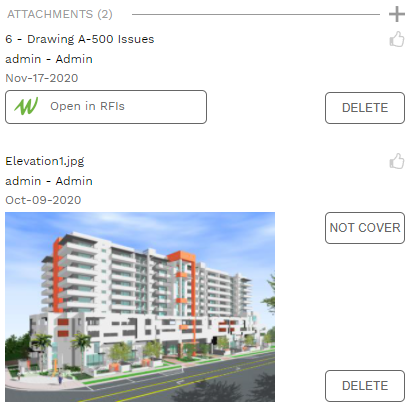
Every task can contain an unlimited number of attachments. The latest attachment appears at the top of the list. The title bar of the section shows the number of attachments it contains. To the right of the title is the Plus button. Click the Plus button to add an attachment. The attachment menu opens. Menu options include:
Your Computer - Click to open your computer's browse for file function.
Web URL - Click to open a dialog in which you can enter a Web URL
For each attachment, you can:
Click the Delete button to remove it
Click the Like button to like the attachment. Click again to remove the like. If the icon is dark gray, you have liked the attachment. The number of likes an attachment has received appears next to the button.
For an attachment uploaded to the task, you can click a button or thumbnail to download the file. For Document Manager links, click the button to open in Document Manager. For record links, click the button to navigate to the record. For Web links, click the button to open the Web page in a new browser tab.
One image file - pdf, jpg, jpeg, bmp, or png - can show as a thumbnail for the task in Card View. If the image is the current thumbnail, the "Not Cover" button appears next to it in the attachments section. Click the button to stop using at as the task thumbnail or click the "Cover" button next to a different image.