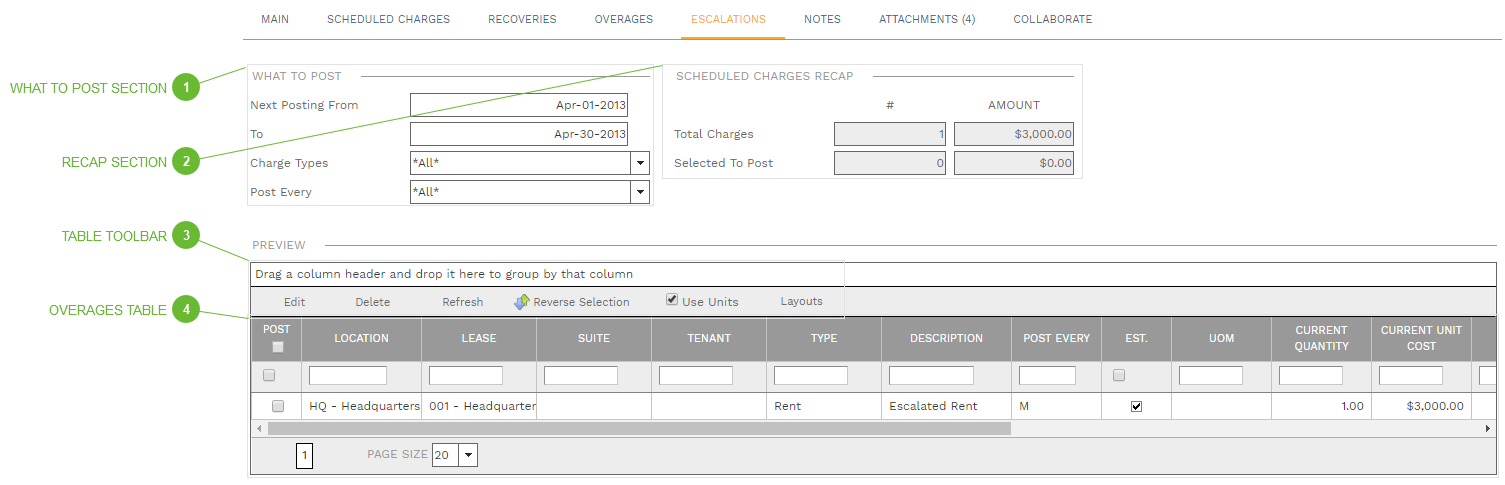
This tab displays all of the active charges that have an Overage component, as defined in the Lease Charges Details dialog and filtered by the parameters. In order for the overage charge to be calculated you must enter an Actual Amount for each line in the spreadsheet. In the Overage Amount field click the Details button to open the Overage Details Dialog. Enter an Actual Amount in the dialog – typically the tenant’s net or gross income – and click the Calculate button. Each break point amount is calculated for you and summed to determine the Overage Amount. Note that you can override the Overage Amount calculation if you wish by typing in the field. When you click Save & Exit the Overage Amount is copied into the sub-grid of the Overages tab line. Note that you can also enter the Actual Amount in the table on the tab but you won't see the break point details unless you open the Overage Details Dialog.
Post Checkbox - If this box is checked the charge will be processed when the Post button in the is clicked. If unchecked, the charge will be unchanged whether or not the Lease Administrator batch is posted.
Location, Lease, Suite, Tenant, Post Every, and Est. Fields - Read only. From the lease.
Overage Amount Field - Default is Quantity times Unit Cost but may be edited. If you edit this field, Unit Cost is recalculated as Overage Amount divided by Quantity. Click the button in this field to open the Overage Details Dialog.