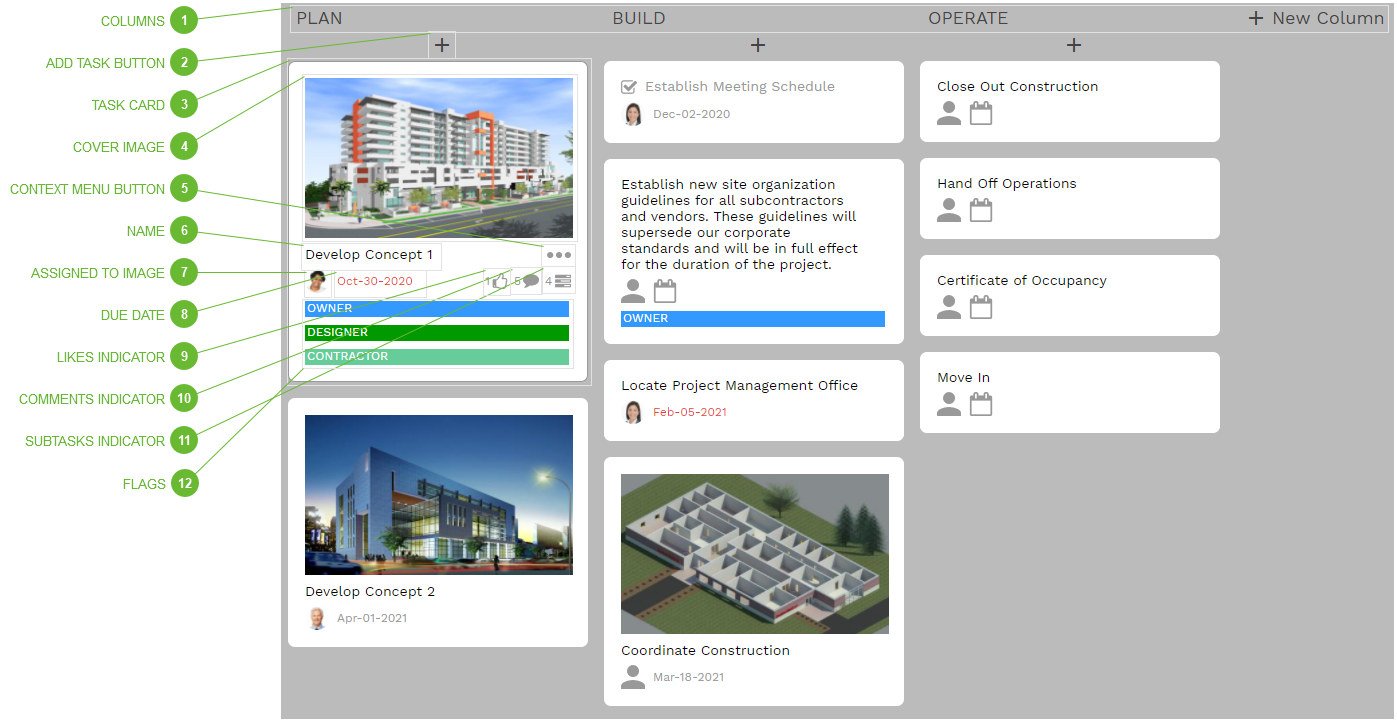
This row shows the name of each column defined in the board as well as the "New Column" button.
Add a Column - To add a column, click the New Column button, type a name, and press ENTER. If you do not type a name and press ENTER, the column is abandoned and not saved.
Move a Column - To move a column, hover over the name until a border appears, click, hold, and drag the column left or right.
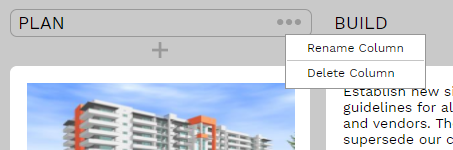
Rename a Column - To rename a column, hover over the name until the ellipse button appears. Click the ellipse button to open the column context menu. Select "Rename Column". Type a new name and press ENTER to save.
Delete a Column - To delete a column, hover over the name until the ellipse button appears. Click the ellipse button to open the column context menu. Select "Delete Column".
Click this button to add a task to the column. Type the name of the new task and press ENTER. If you do not type a name and press ENTER, the task is abandoned and not saved.
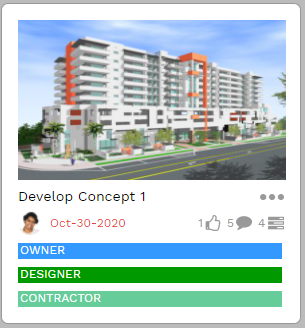
The task card highlights some of the information associated with the task. The quickest way to move a task up or down within its column or to a different column in the same board is to click on the card, hold, and drag the card to a new location.
This button appears when you hover over the card. Click the button to open the context menu:
Mark Done - Click to mark the task as done. If the task was previously marked done, this option changes to "Mark Undone". Done status can also be edited in the Task Details Dialog.
Copy Task - Click to open the Copy Task Dialog. Using the dialog you can create a copy of the task within the current board or in any other active board you have access to.
Move Task - Click to open the Move Task Dialog. Using this dialog you can move the the task within the current board or to any other active board you have access to.
Delete Task & Subtasks - Click to delete the selected task as well as all of its subtasks
If this indicator appears, the task contains at least one "Like". The number of likes appears next to the icon. You can like a task in the Task Details Dialog.
If this indicator appears, the task contains at least one comment. The number of comments appears next to the icon. Comments can be viewed in the Task Details Dialog.
If this indicator appears, the task contains at least one subtask. The number of subtasks appears next to the icon. Subtasks can be viewed in the Task Details Dialog.