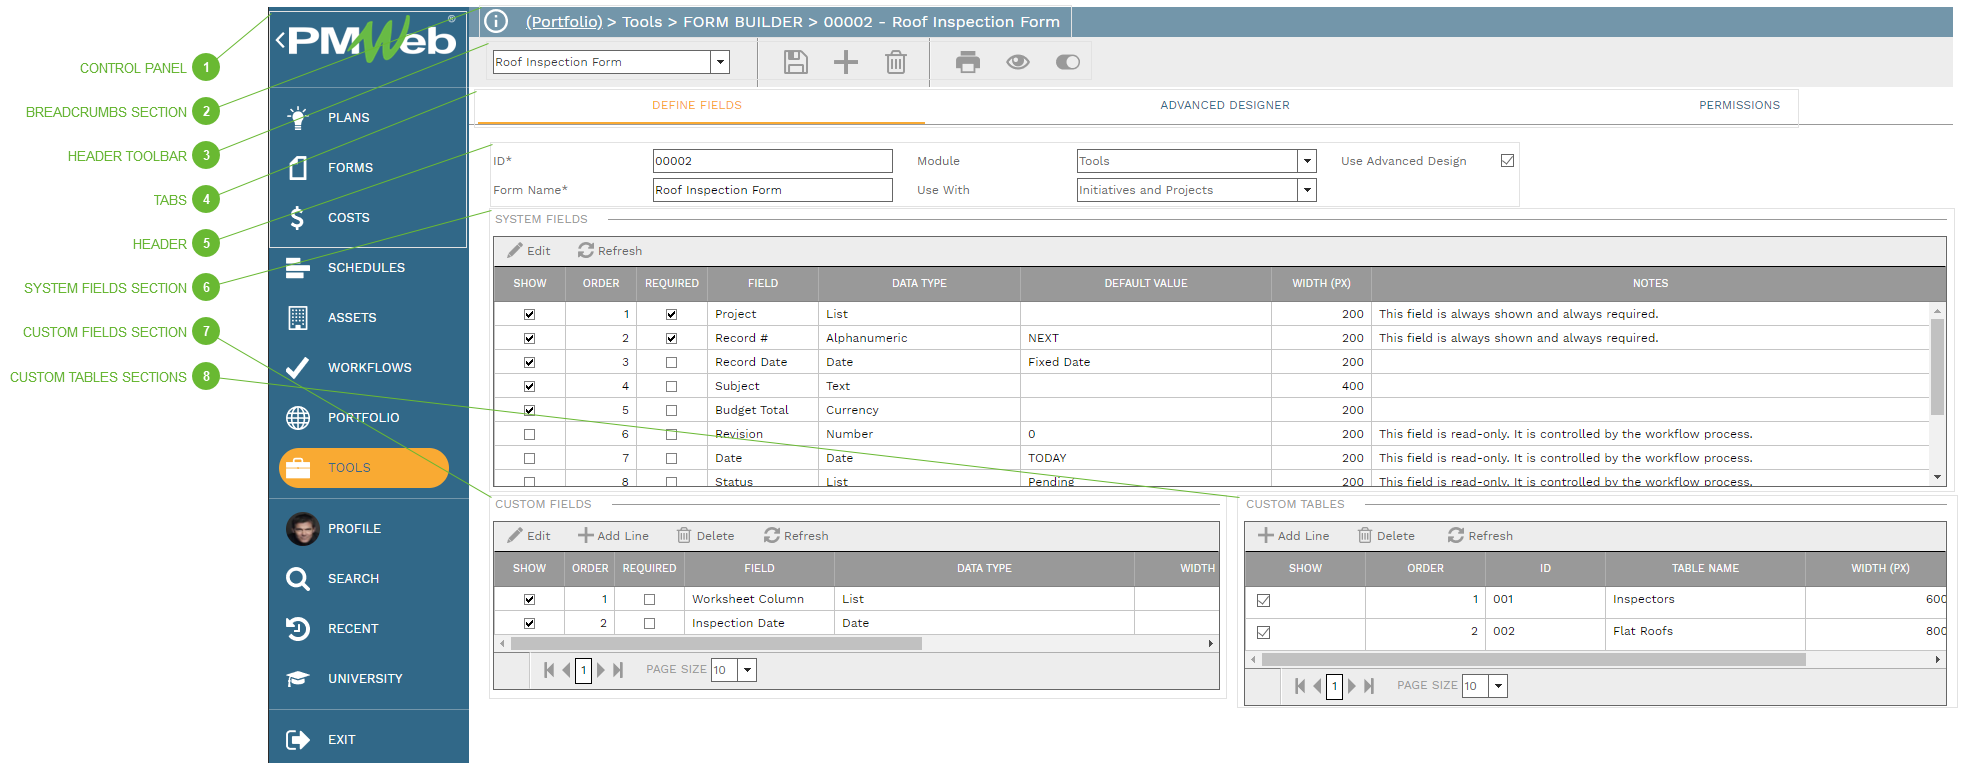
You can use Form Builder to design and publish forms do not come out of the box with PMWeb. The forms you create act like standard PMWeb forms do: you can add notes, attachments, send them through Visual Workflow, and more. There are three major steps to designing a form:
Use the Define Fields tab to configure system fields, create custom fields, and create custom tables.
Use the Designer tab to configure the layout of your form. Note that you must have a license for the Advanced Designer to use the Design tab.
Use the Permissions tab to share the form with some or all users
This table lists system fields that can be included on your form. Use this table to configure system fields options, including showing or hiding some fields, adding default values, and making fields required. Note that Project and Record # fields are always shown and always required.
Show Checkbox - Check this box to have the system field display on your form.
Field # Field - The order in which the field appears on the basic form. To edit this field, drag lines in the table and drop them in a new position.
Required Checkbox - If this box is checked, users will not be able to save the record without editing the field.
Field Field - Read only. The name of the system field.
Data Type Field - Read only. The data type of the field.
Default Value Field - Enter a default value for the field here.
Width (PX) Field - Enter the width of the control, in pixels, as you want it to appear in your form.
Notes Field - Read only. Notes regarding the system fields.
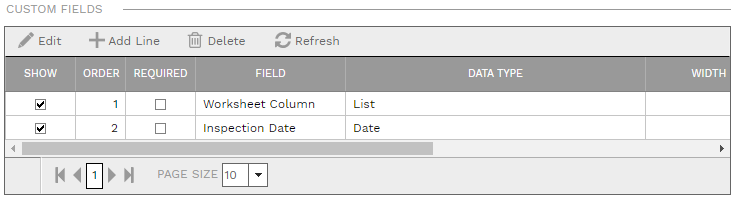
Use this table to create data fields to show on your form.
Show Checkbox - Check this box to have the system field display on your form.
Field # Field - The order in which the field appears on the basic form. To edit this field, drag lines in the table and drop them in a new position.
Required Checkbox - If this box is checked, users will not be able to save the record without editing the field.
Label Field - Required. The name of the field.
Data Type Field - The data type of the field.
Width (PX) Field - Enter the width of the control, in pixels, as you want it to appear in your form.
Default Value Field - Enter a default value for the field here.
Calculation Field - Number and currency fields can be calculated fields. Click the helper button in the field to open a dialog where you can define the calculation.
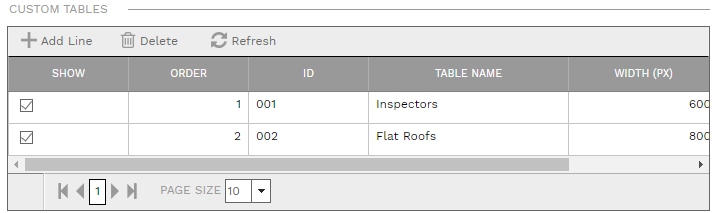
Use this table to create custom tables to add to your form. Tables can be locked, meaning they have a fixed number of lines, or unlocked.
Show Checkbox - Check this box to have the table display on your form.
Order Field - The order in which the table appears on the form. To edit this field, drag lines in the table and drop them in a new position.
ID Field - Required. An alphanumeric ID for the record. This field can be edited in the Design Table dialog.
Table Name Field - This field can be edited in the Design Table dialog.
Width (PX) Field - Enter the width of the table, in pixels, as you want it to appear in your form.
Edit Button - Click this button to open the Design Table dialog.
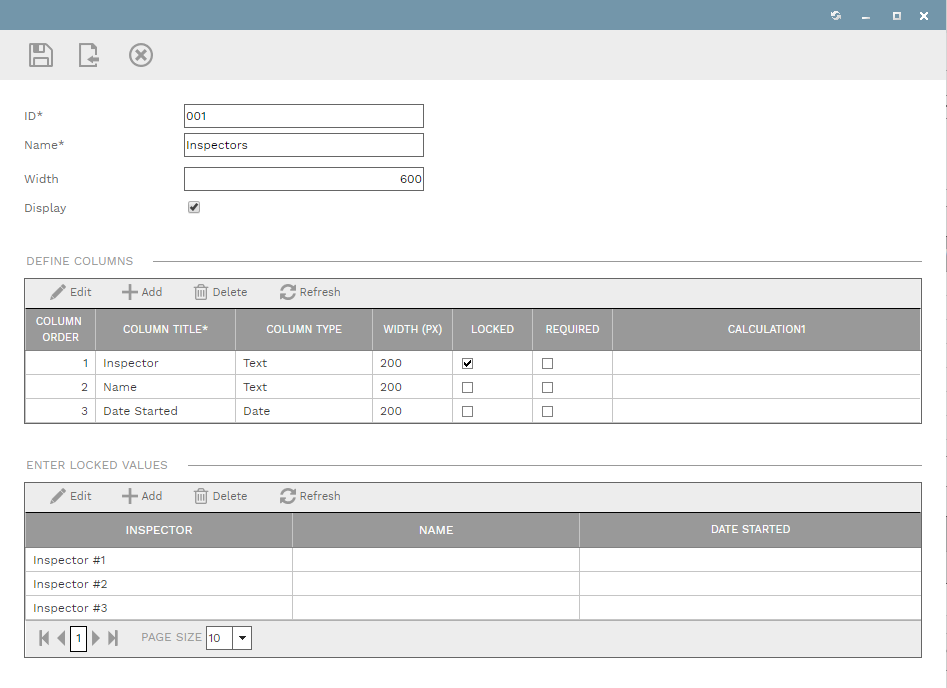
Use the Design Table dialog to build and configure custom tables for your form. Each line in the Define Columns table becomes a column in your table. If your table has a fixed number of lines, put a check in the Locked column for one of the fields and then enter the fixed row values in the Enter Locked Values table.