×
Menu
Index

Org Chart Builder

 
Org Chart Builder
1

COLLAPSE BUTTON

1. COLLAPSE BUTTON
Click this toggle button to expand or collapse branches in the chart.
2

RESOURCE TOTAL

2. RESOURCE TOTAL
The sum of the % field for all assigned resources in the group.
3

DRILL DOWN BUTTON

3. DRILL DOWN BUTTON
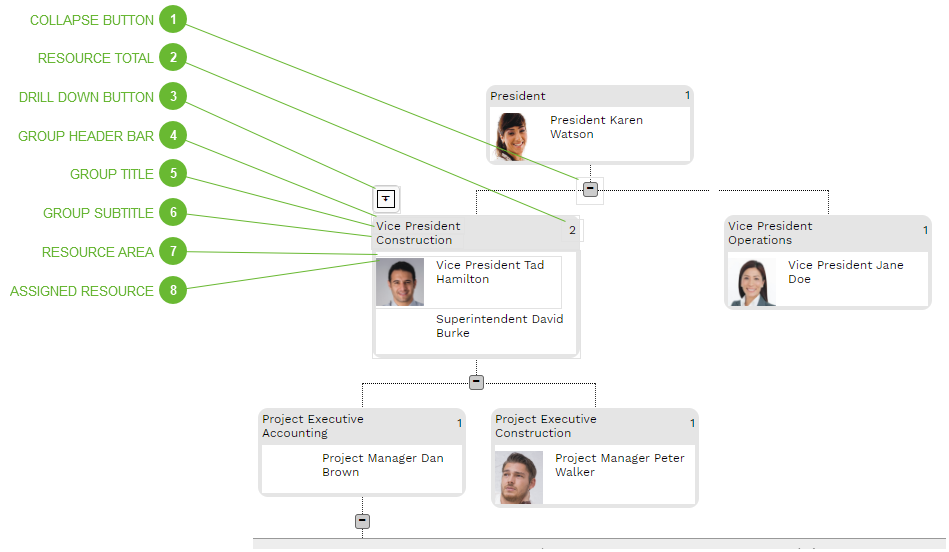
When you hover the mouse cursor over a group this button appears. Click this button to isolate branches of the chart. The group you drilled down on appears at the top of the chart and all of its branch groups appear below it. After drilling down, "drill up" buttons appear.
 
  • The button on the left drills up one level
  • The button on the right drills all the way up to the top level of the chart
 
 
4

GROUP HEADER BAR

4. GROUP HEADER BAR
Right-click on this header bar to open a context menu:
  • Delete Group - Deletes the current group and any resource assignments for it
  • Add Group - Opens the Edit Group Dialog to a new, empty, record
  • Edit Group - Opens the Edit Group Dialog with the current group information loaded.
 
5

GROUP TITLE

5. GROUP TITLE
The Title of the group, as entered in the Edit Group Dialog
6

GROUP SUBTITLE

6. GROUP SUBTITLE
The Subtitle of the group, as entered in the Edit Group Dialog
7

RESOURCE AREA

7. RESOURCE AREA
The white space is called the Resource Area. Right-click in this area to open a context menu.
  • Delete Selected Resource(s) - Deletes one or more selected resource assignments
  • Select ALL - Selects all resource assignments in the group prior to deleting them
  • Add Resource - Opens the Edit Resource Dialog to a new, empty, record
  • Edit Resource - Opens the Edit Resource Dialog with the current resource assignment loaded. Resources can also be assigned by dragging them from the Resources Table Flyout and you can also drag and drop a resource from one group to another.
8

ASSIGNED RESOURCE

8. ASSIGNED RESOURCE
The Title and name of the assigned resource.