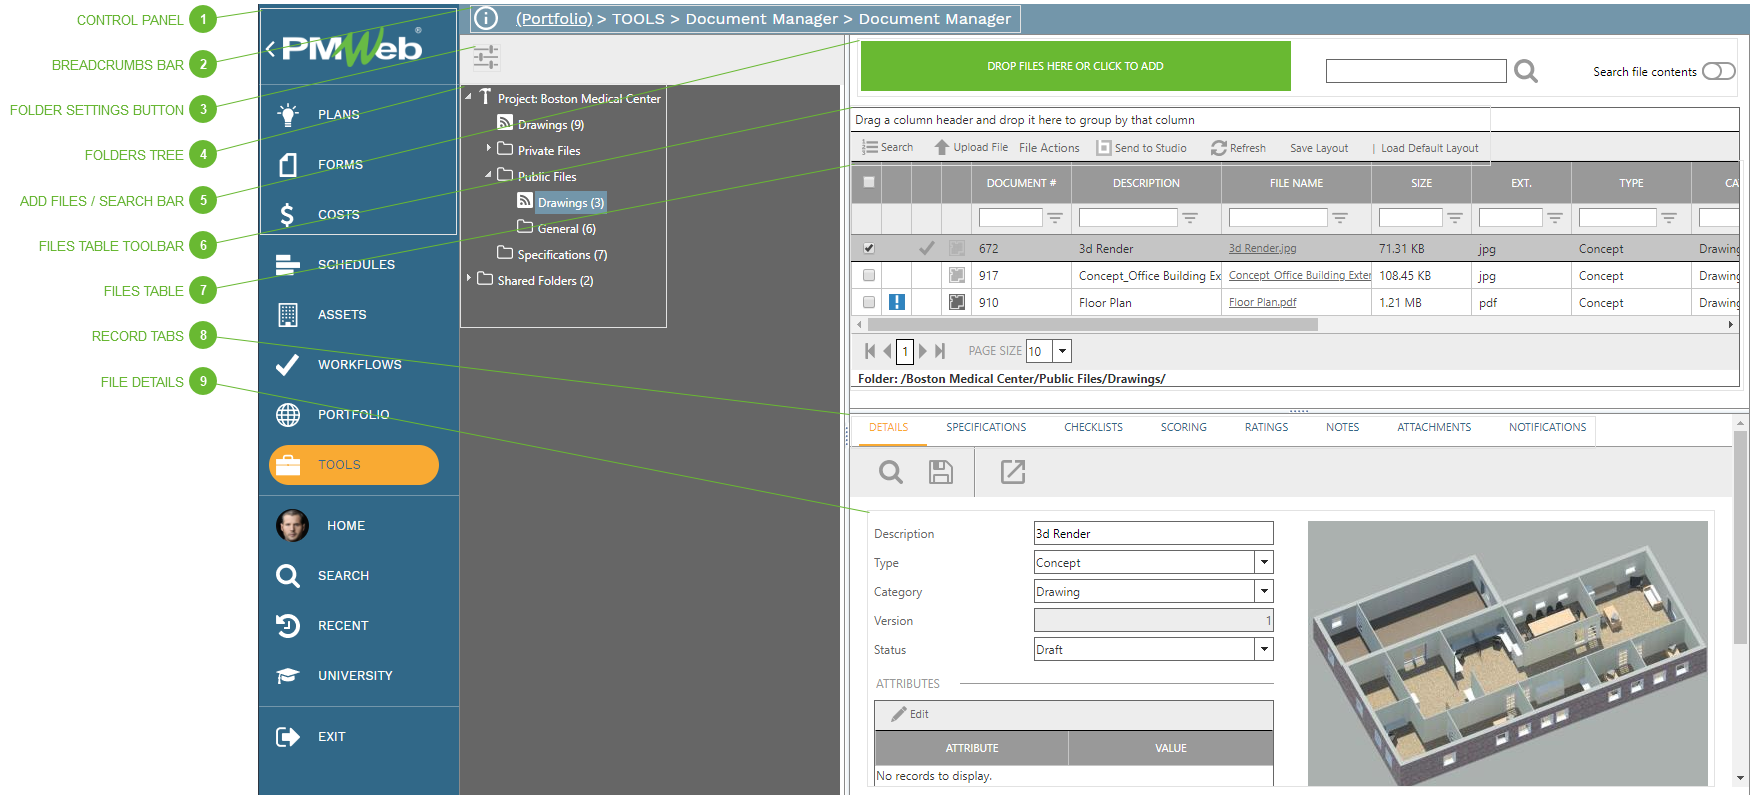
In the PMWeb Document Manager define any folder structure you like to store, use, and retrieve, digital content. You can drag and drop files between folders, check them in and out of the system, enable file versions, and define custom attributes to store file metadata. You can even subscribe to Document Manager folders to be alerted when content changes.
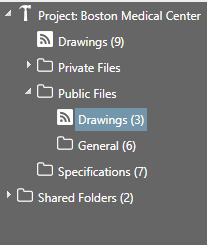
This tree represents a user defined folder structure. Use the tree to locate files you wish to work with as well as to build the folders themselves. Files from one folder can be selected in the Document Manager Header then dragged and dropped into another folder in the tree.
Right click on a folder to open a context menu:
New Folder - Creates a new folder directly beneath and at the same level as the folder you right clicked on
Open - Loads the folder in the Document Manager Header. This is the same as left clicking on the folder.
Copy Folder - Copies the folder to your device's clipboard. This includes the folder, it's configuration options (see Edit Folder Dialog) as well as all files within the folder that are not currently checked out
Paste Folder - Pastes the folder copied using the Copy Folder command as a subfolder of the folder you right clicked on
Delete - Opens a confirmation dialog. If you click the OK button in the dialog the folder and all of its files will be deleted.
Search Field - Type keywords in the field and click the search button. PMWeb searches fields shown in the files table, including user defined file attributes.
Search File Contents Switch - If the switch is on, PMWeb attempts to search within documents for keywords, in addition to the fields it regularly searches.
Download - Downloads the currently selected file to your device following the protocols of your operating system
Copy - Copies the currently selected files to your device's clipboard
Paste - Pastes the files copied using the Copy command into the currently loaded folder
Check In - Only available if one file is selected. Opens the Update File Dialog
Check Out - Applies "Checked Out" status to currently selected files. Checked out files cannot be overwritten except by the user who checked them out.
Cancel Check Out - Removes "Checked Out" status from the currently selected files without requiring an upload of replacement files
PMWeb Viewer - Only available if one file is selected. Creates a new PMWeb Viewer record linked to the currently selected file.
Delete - Opens a confirmation dialog. If you click the OK button in the dialog the selected files are deleted.
Show Latest Versions Only - This is a toggle setting which persists until the user changes it. With it toggled on, only the highest version number in the folder for each document will be displayed in the Document Manager Header Table. With it toggled off, all versions of all files in the folder will be displayed.
Send to Studio Button - Creates a new Bluebeam session with selected files attached. This button is only enabled if all currently selected files are eligible to be added to a Bluebeam session. See Bluebeam Markups.
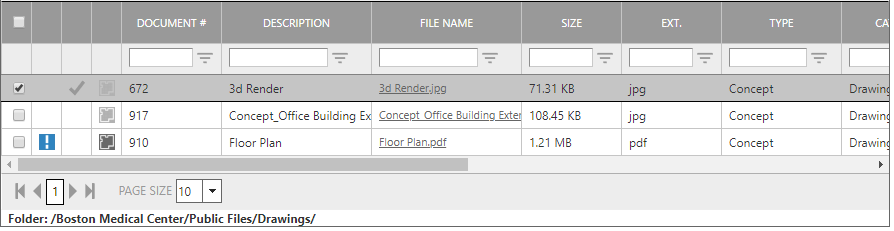
Select Checkbox - Use these checkbox to select files, either for dragging and dropping to another folder or in conjunction with one of the file actions described in above. Files can also be selected by clicking and dragging across them.
Bluebeam Indicator - An icon in this field indicates that the file is part of an active Bluebeam Markups session. Click the icon to navigate to the markups record.
Checked Out Indicator - An icon in this field indicates that the file is currently checked out. Click the icon to open the Update File Dialog if you wish to check it in.
Viewer Indicator - An active icon in this field indicates that the file is linked to a PMWeb Viewer record. Click the icon to navigate to the viewer record.
Document # Field - Read only. A sequential number assigned by PMWeb.
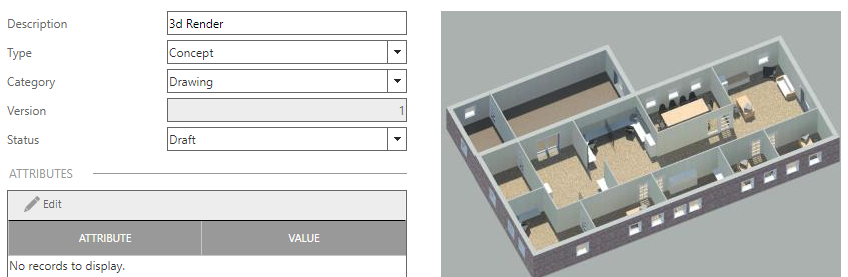
Description Field - See File Details, below.
File Name Field - Read only. The name and extension of the file. Click to download the file.
Size Field - Read only. The size of the file on disk
Ext. Field - Read only. The file extension. A setting in the PMWeb Admin Utility allows administrators to create a "white list" of allowed file extensions.
Type, Category, Workflow Status, and Version Fields - See File Details, below.
User defined attribute fields may also be shown in this table. See File Details, below.
Version Field - Read only. If versions are enabled for the folder (see Edit Folder Dialog) PMWeb will automatically increment this field each time a file with the same name and extension is uploaded.
Attributes Table - If custom attributes are created for the folder (see Edit Folder Dialog) they will appear here. Click one or more lines to highlight them, click the Edit button, and then enter attribute data for the file.
Preview - A thumbnail of the file. (Not all file types can be previewed.)