×
Menu
Index

PMWeb 3D Viewer

 
Use the PMWeb 3D Viewer to view, interact with, and analyze 3D models. See Getting Started With PMWeb 3D Viewer for more information.
 
PMWeb 3D Viewer
1

Home Button

1. Home Button
Click this button to return to the default view.
2

Model Information Button

2. Model Information Button
Click this button to view information about a selected model element:
 
3

Orientation Cube

3. Orientation Cube
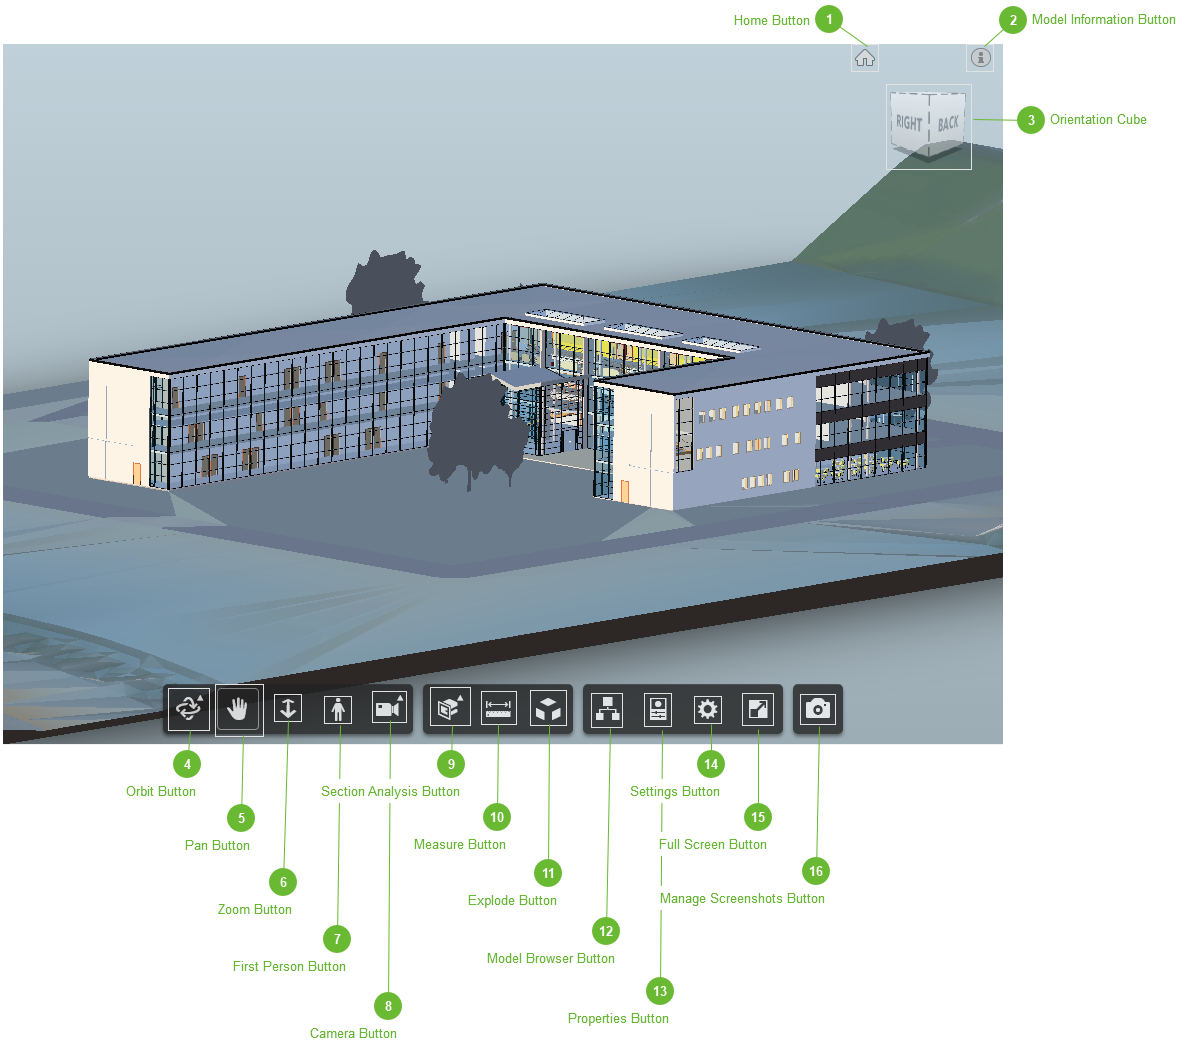
Use this control to change the orientation of the model view. Click a face in the cube - "Front", for example - to switch to the front view of the model or click and hold an edge of the cub to rotate in that orientation.
4

Orbit Button

4. Orbit Button
Click near the top of the button to open the toggle menu and select either:
 
  • Orbit - Click and drag in the model view to orbit horizontally around the center of the model
  • Free Orbit - Click in the model to establish an orbit center and then click and drag to orbit in all axes
5

Pan Button

5. Pan Button
Click to enable. With the button enabled click and drag in the model view to pan up, down, left, and right.
6

Zoom Button

6. Zoom Button
Click to enable. With the button enabled:
 
  • Click and drag up or right to zoom out
  • Click and drag down or left to zoom in
7

First Person Button

7. First Person Button
Establishes an orthographic project view of the model
8

Camera Button

8. Camera Button
Click near the top of the button to open the camera menu and select either:
 
  • Fit to View - Zooms to fit the extents of the model using the current view
  • Focal Length - Click and drag up or right to increase focal length. Click and drag down or left to decrease focal length.
  • Roll - Click and drag to roll the current view clockwise and counter-clockwise.
9

Section Analysis Button

9. Section Analysis Button
Click near the top of the button to open the section analysis menu and select either:
 
  • Add X Plane
  • Add Y Plane
  • Add Z Plane
 
After selection any of these a section controller appears in the view. This is an example of the controller as it appears with a Y Plane section:
 
 
Drag the elements of the control to change the depth and angle of the section.
 
  • Add Box - This option creates a section box which allows you to control the section in all axes
 
Click the Section Analysis button again to remove the section view
10

Measure Button

10. Measure Button
Click this button to open the Measure Dialog.
 
 
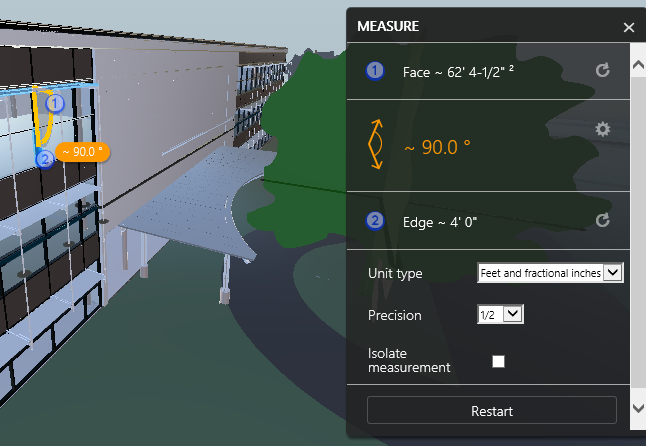
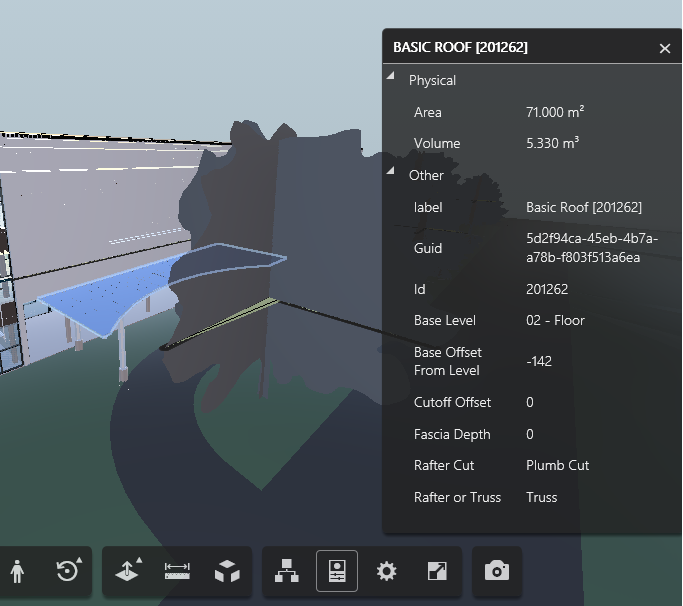
Click an element in the model to view its measurements in the dialog. Click the Settings button to open the settings panel. Select a Unit type and Precision. The Isolate measurement checkbox hides all elements of the model except the one being measured. Click the Close button to dismiss the Measure Dialog.
11

Explode Button

11. Explode Button
Click this button to display the Explode slider:
 
 
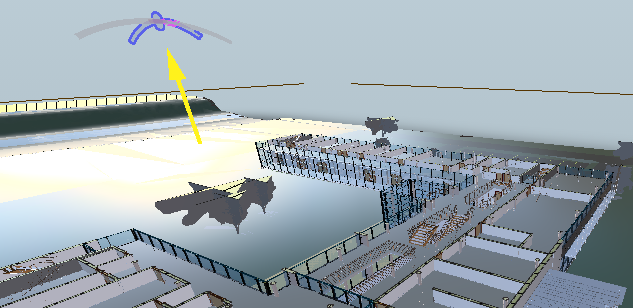
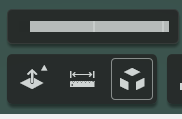
Click the left side of the slider and drag to the right to "explode" the model view into its components. Drag the slider left to collapse the model view.
12

Model Browser Button

12. Model Browser Button
Click this button to open the Model Browser Dialog. The browser displays model elements grouped by family. When you click a family the model view is redrawn as translucent with the elements in that family highlighted. This screenshot shows the model with the "Stair" family selected in the browser:
 
 
Click in the Filter by name field to return to viewing all of the model elements.
 
Click the Close button to dismiss the Browser Dialog.
13

Properties Button

13. Properties Button
Click this button to display details about the selected model element:
 
 
14

Settings Button

14. Settings Button
Click this button to open the Settings Dialog:
 
 
Experiment with various settings to find the combination that gives you the best experience for your 3D Viewer session.
15

Full Screen Button

15. Full Screen Button
Click this button to open the PMWeb 3D Viewer in full screen mode. Click the button again or press the ESC key to return to regular mode.
16

Manage Screenshots Button

16. Manage Screenshots Button
Click this button to open the Screenshot Dialog. Use this dialog to quickly take a number of screenshots and attach them to the current record. This is similar to using the Snapshot Dialog except that the Snapshot Dialog gives you more options.