Tables like the one below are used throughout PMWeb to display, add, and edit data. This article discusses some of the standard features of PMWeb tables.
Important Note: Not all tables offer all of the features discussed here.
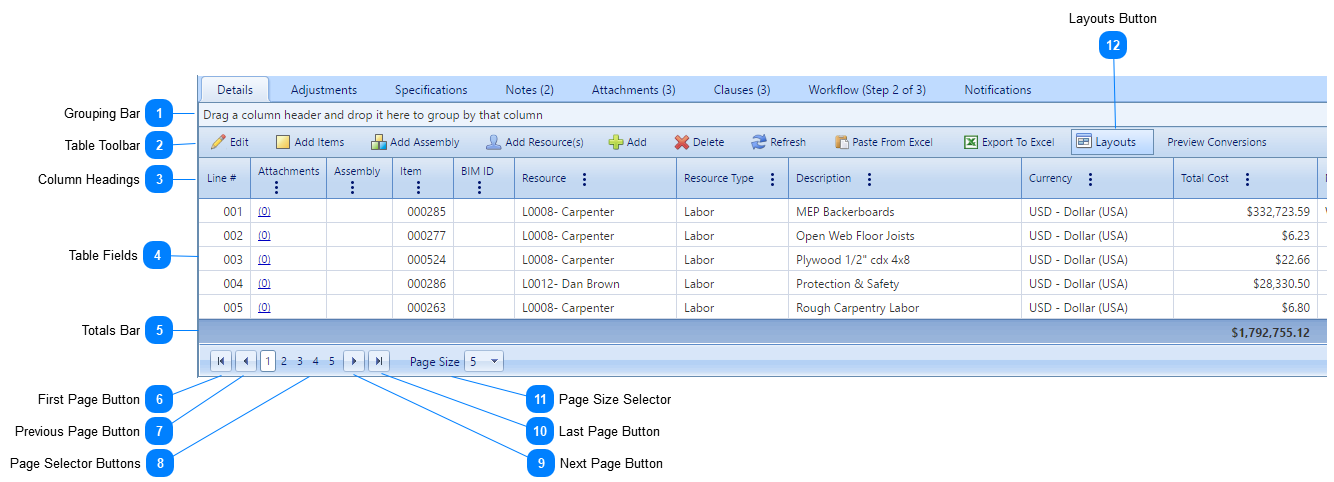
Grouping Bar
Click and hold one of the column headings, drag it to this bar, and drop it. The table is reloaded, grouped by that column. You can drag and drop additional column headings to create sub-groupings. To remove a group level, click on it, drag it away from this bar, and drop it. Note that not all columns can be used for grouping.
The buttons that appear in the toolbar vary based on record type but these buttons are most common:
Edit - In most tables you must open lines fro editing. Click a line to select it, or click and drag or CTL+click to select multiple lines, and then click this button to open them for editing
Add - Click to add a new line to the table, open for editing
Delete - Select one or multiple lines and then click this button to delete
Refresh - Click to load the table with the latest linked data or filter parameters
Layouts - Use this button to save and edit custom table layouts. See Layouts Button.
Many tables let you customize the table using these actions related to column headings:
Reorder Columns - Change the order of columns by clicking and holding a heading and dragging it left or right
Sort Columns - Click once on the column heading label to sort by that column in ascending order. Click a second time to reverse the order. Multiple columns can be selected for sorting - sorting takes place from left to right in column order. Note that not all columns - including User Defined Fields - can be used for sorting.
Filter by Column - If the "Advance filters" option is checked in the My Settings Page three vertical lines appear in the column heading. Click to open the Table Header Context Menu for filtering. If advanced filters are not enabled the filter band appears just below the column headings:
Click in the white area of the filter band, type something, and then click the filter button to open the parameter selection menu.
To edit data in these fields select one or more lines and then click the Edit button in the toolbar to open them for editing. In some tables you can change the Line # by dragging lines up or down in the table and dropping them in a new position.