Use this dialog to view, create, and edit conditional statements which, if they logically evaluate as true in a record, automatically take a selected workflow action.
Required. This defaults from the record type folder that was right clicked to begin the Add Branch Rule process (see BPM Tab Define Steps Section) but may be edited. This field is locked if there are lines in the Expression table.
Select a currency from the dropdown list. Currency type fields in the Expression table will be converted to the currency selected here before the branch rule expression is evaluated.
If this box is checked, after this branch rule has been invoked once for a record it will be reevaluated every time the workflow "Approve" action occurs
The message entered here will be displayed in the log each time the branch rule takes a workflow action and can be inserted into Workflow/Setup/Email Templates.
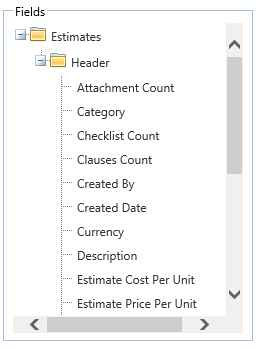
This tree shows the fields which can be evaluated in a branch rule expression. The fields displayed vary depending on the record type (shown in the root folder). Click a field in the tree, drag it to the Expression table and drop it. A line is added to the bottom of the table with this field in it.
This table is used to build a logical expression which will be evaluated when the branch rule is invoked. If the expression is this table evaluates as true a workflow action will be taken.
To build an expression, drag fields from the tree on the left and drop them on the table. A new line with that field in it will be added to the bottom of the table. Click one or more lines to select them and then click the Edit button to open them for editing. Complex expressions, including nested segments, can be created using the Left Brackets, And/Or, and Right Brackets fields. The operators available to select from the dropdown list and the edit tools in the Value field will vary depending on the data type of the selected field.
To delete lines, click one or more lines to select them and then click the Delete button.
Click a radio button in this section to determine which workflow action will be taken if the expression evaluates as true.
Note that this section is not editable if the dialog is opened by double clicking lines in the Steps table or by clicking an element in the Visual Workflow section of the Business Processes (BPM) Tab.