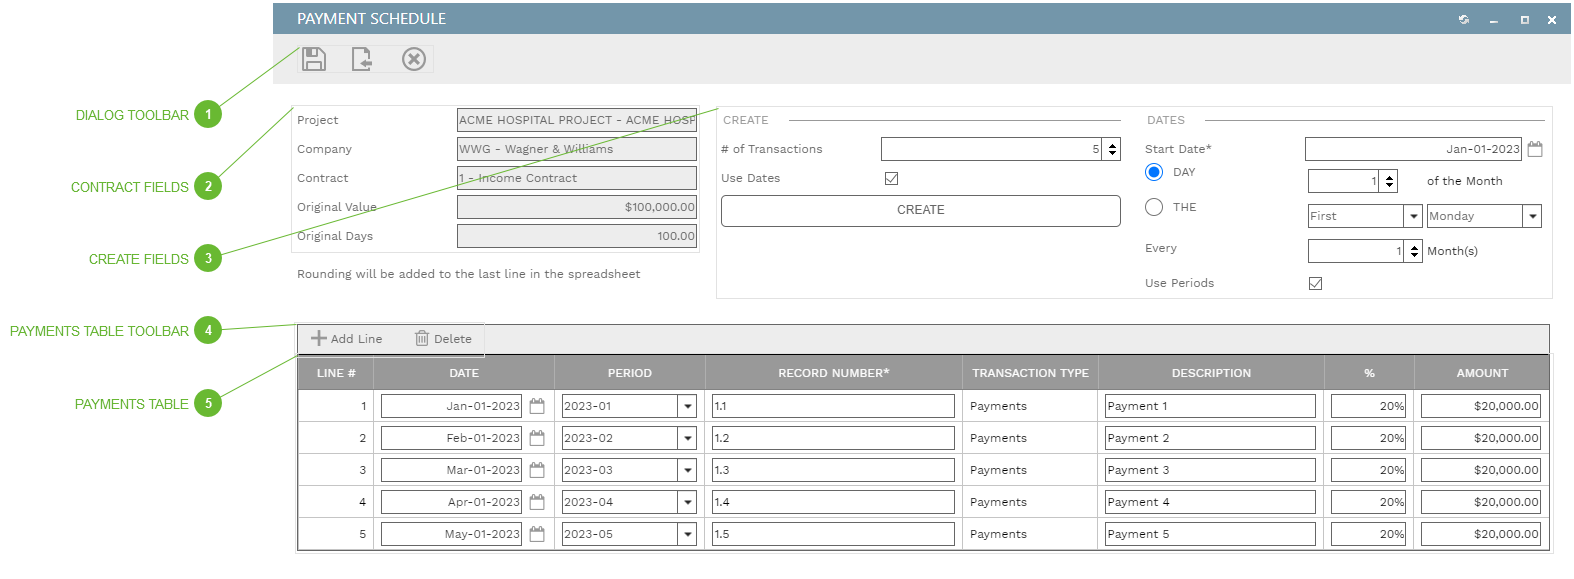
Use this dialog to create and anticipated schedule of payments for Prime Contracts or Commitments. Lines in the Payments table can be created manually or generated using the Create button.
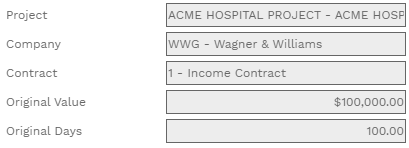
If you are using the Create function to automatically add lines to the Payments table, use the fields in this section to configure them. If you are manually adding lines to the table - by clicking Add Line in the table toolbar - you can ignore these fields.
# of Transactions Field - Enter the total number of scheduled payments here
Use Dates Checkbox - If checked, the Dates section is displayed and dates will be applied to each payment that is created. If unchecked, payment dates will default to empty.
Create Button - After all of the fields in this section are configured, click this button to automatically add lines to the Payments table. Create divides the Original Value by the # of Transactions and creates a Payment line for each.
Note: the fields in this section only appear if the Use Dates checkbox is checked.
Start Date* - Required. A date on or before the first payment date. Date Field
DAY and THE Radio Buttons -
DAY: select the 1st, 2nd, 3rd.... of the month (1-31) using the number field
THE: select First, Second, Third, Fourth, or Last day of the week using the two dropdown lists
Every - enter the interval, in months, between payments
Use Periods Checkbox - If checked, PMWeb will attempt to assign a Period to each line in the Payments table, based on the Date
Record Number* Field - Required. A unique ID for the payment
Transaction Type Field - Read Only. "Payments".
Description Field - Enter a description for the payment
% Field - The % of Original Value that should appear in the line. IMPORTANT NOTE: If you edit % on any line, the Amount for that line only is automatically recalculated. Other lines are not adjusted. You may need to manually adjust other lines to keep the total Amount equal to the Original Value.
Amount Field - The currency value of the payment. IMPORTANT NOTE: If you edit Amount on any line, the % for that line only is automatically recalculated. Other lines are not adjusted. You may need to manually adjust other lines to keep the total Amount equal to the Original Value.