×
Menu
Index

Map Fields Dialog

 
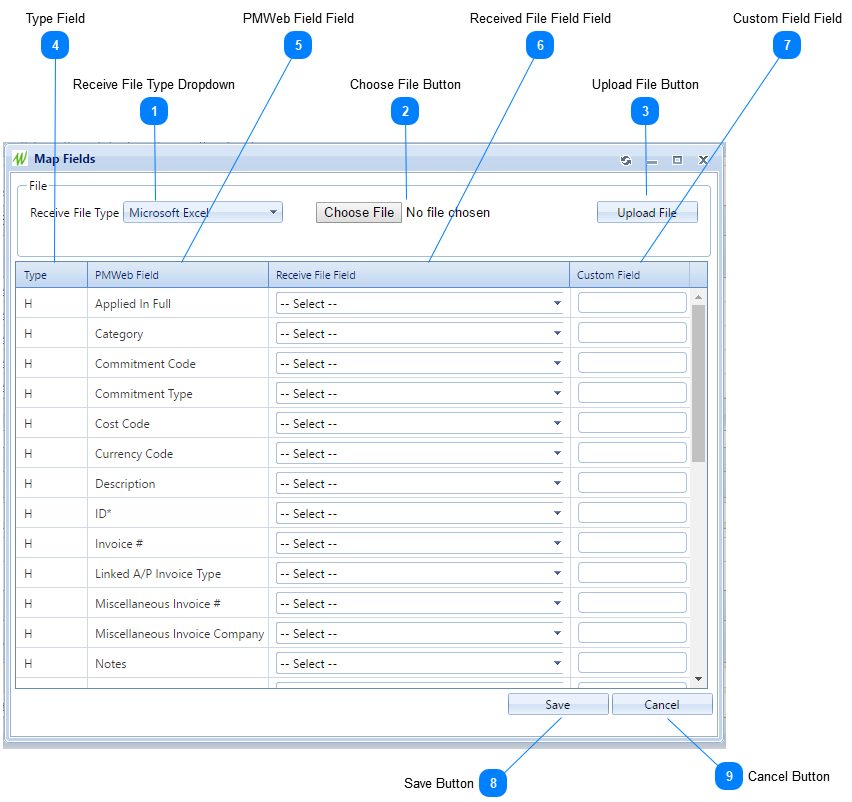
Use this dialog to map fields from the input file to fields in the PMWeb record. Use the header of the dialog to load a sample input file and then use the table to map the fields.
 
Map Fields Dialog
1

Receive File Type Dropdown

1. Receive File Type Dropdown
Select an input file format here. Types are:
 
  • Microsoft Excel
  • Text (Comma Delimited)
  • Text (Tab Delimited)
  • Text
2

Choose File Button

2. Choose File Button
Click this button and browse to the input file.
3

Upload File Button

3. Upload File Button
Click this button to load the selected input file into the dialog. This populates the fields in the Receive File Field column of the table, allowing you to map them.
4

Type Field

4. Type Field
Read only. This field indicates that the field is from the header ("H") or the details ("D") of the record.
5

PMWeb Field Field

5. PMWeb Field Field
The system name of the PMWeb field
6

Received File Field Field

6. Received File Field Field
Select the corresponding field from the input file. Not all fields need to be mapped but PMWeb required fields do.
7

Custom Field Field

7. Custom Field Field
 
8

Save Button

8. Save Button
Click this button to save your edits and close the dialog.
9

Cancel Button

9. Cancel Button
Click this button to close the dialog. Unsaved changes will be lost.